
Step-by-Step Guide: How to Change a 2-Stroke Dirt Bike Piston
How to Change a 2-Stroke Dirt Bike Piston: A Step-by-Step Guide
There is nothing quite like the sound of a crisp, fresh 2-stroke engine singing on the pipe. The throttle response is snappy, the power is instant, and the bike feels alive. However, if your trusty machine has started to feel sluggish, is harder to start than usual, or simply has high hours on the meter, it might be time for some maintenance.
For many riders, the idea of opening up an engine is intimidating. It feels like a job best left to the expensive professionals at the shop. But here is the truth: performing a 2-stroke top end rebuild is one of the most essential skills a dirt bike owner can learn. It saves you money, helps you understand your machine, and ensures your bike is running at peak performance.
Changing a 2-stroke dirt bike piston is actually a straightforward process if you have the right tools and a little patience. In this guide, we will walk you through the entire process, ensuring you can get back to the track or trails with confidence.
Tools and Materials You Will Need
Before you spin a single wrench, preparation is key. Having everything laid out will prevent frustration later on. You don't want to be halfway through a dirt bike piston replacement only to realize you are missing a gasket.
Essential Tools:
- Socket set (commonly 8mm, 10mm, 12mm, and 14mm)
- Torque wrench (critical for reassembly)
- Screwdrivers (flathead and Phillips)
- Needle-nose pliers or specialized circlip pliers
- Rubber mallet
- Feeler gauges (for checking ring gap)
- Clean shop rags (lint-free is best)
- Contact cleaner or brake cleaner
Materials:
- New piston kit (Piston, rings, wrist pin, circlips)
- Top end gasket kit (Base gasket, head O-rings/gasket, exhaust gasket)
- Needle bearing (highly recommended to replace this while you are in there)
- Fresh coolant
- High-quality 2-stroke oil (for assembly lubrication)
Step 1: Preparation and Disassembly
• The first step of any engine work is cleanliness. Wash your bike thoroughly. You do not want dried mud or sand falling into your open crankcase. Once the bike is clean and dry, place it on a steady bike stand.
• Begin by removing the seat and the gas tank. This exposes the cylinder head and gives you room to work. Next, locate the coolant drain bolt (usually on the water pump cover) and drain the coolant into a catch pan. You will also need to loosen the hose clamps and remove the radiator hoses attached to the cylinder head.
• Remove the spark plug cap and the spark plug. Depending on your bike model, you may need to remove the upper engine brackets that connect the frame to the cylinder head. Finally, disconnect the exhaust pipe by removing the springs and mounting bolts.
Step 2: Cylinder Head and Cylinder Removal
• Now that the peripherals are out of the way, you can start opening the engine. Using a crisscross pattern, loosen and remove the cylinder head nuts or bolts. Lift the head off. If it sticks, give it a gentle tap with your rubber mallet—never pry it with a screwdriver, as you will damage the sealing surface.
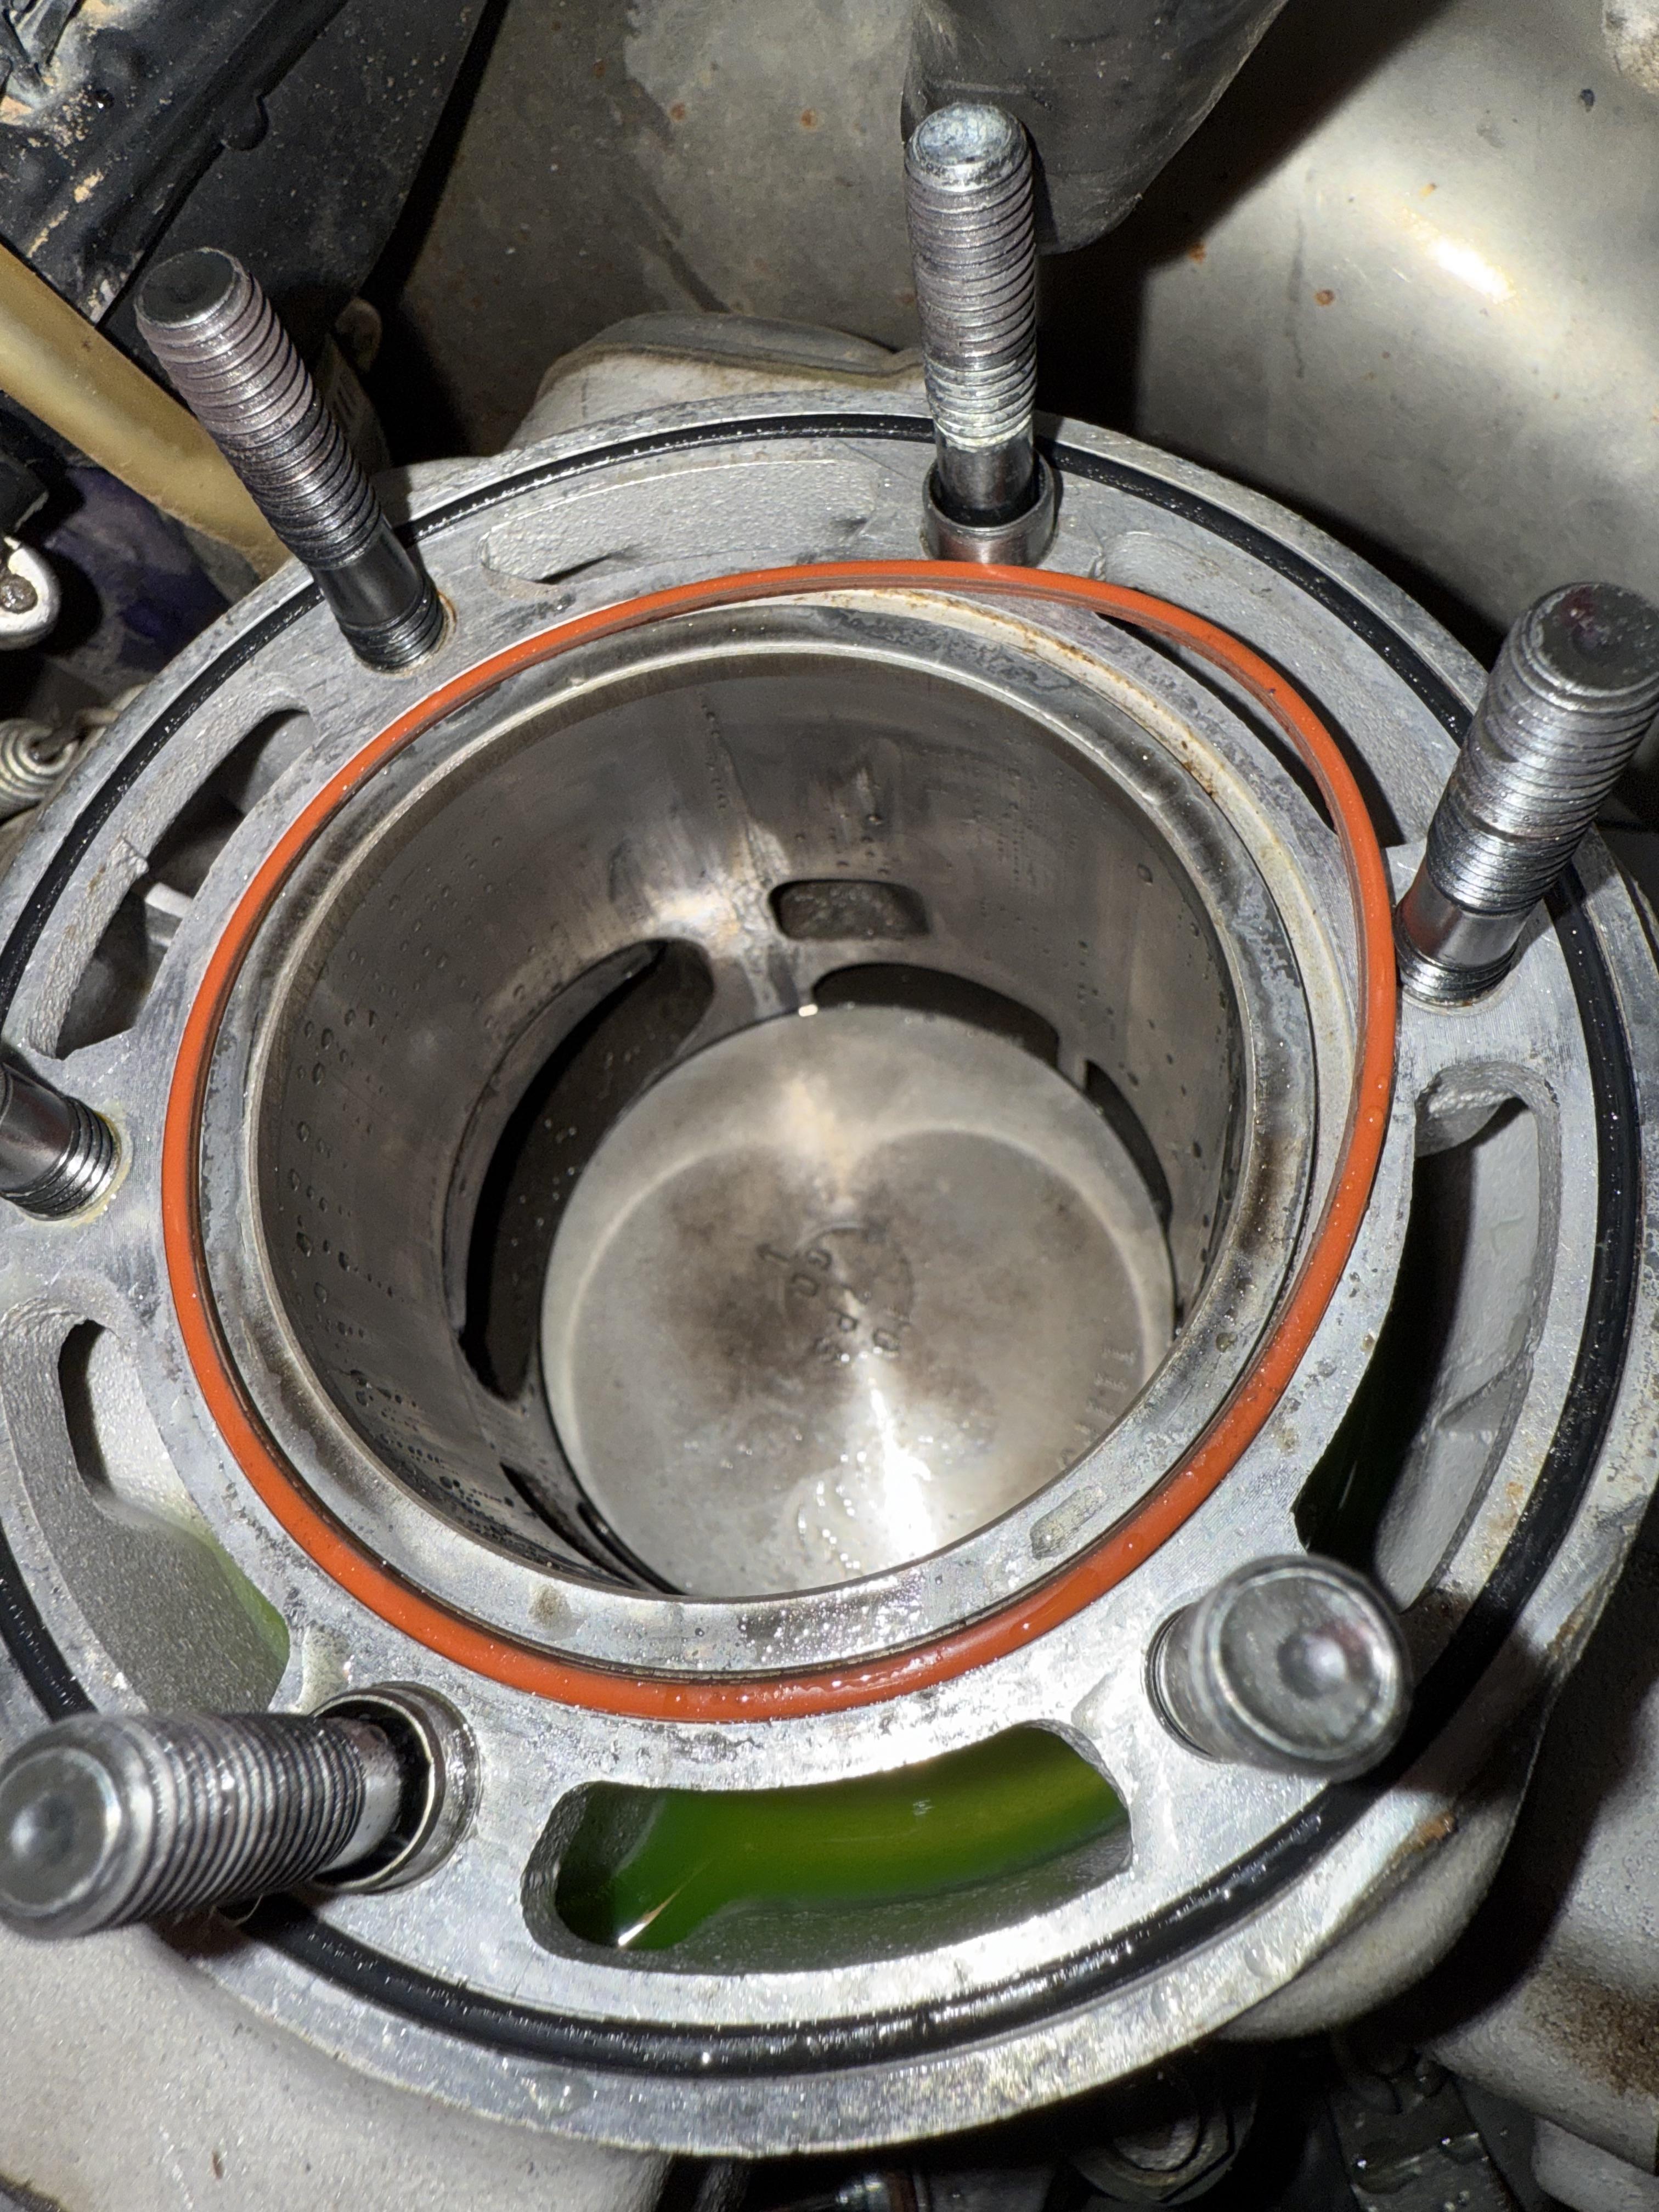
• With the head off, you can look down at the piston. Now, remove the cylinder base nuts. This can sometimes be tight work with a standard wrench. Once the nuts are off, the cylinder should slide up. Again, if it is stuck, a gentle tap with a rubber mallet at the base should free it.
• As you lift the cylinder up and off the piston, be very careful to support the piston so it doesn't slam against the engine cases.
Step 3: Piston Removal
• This is the moment where extreme caution is required. Before you do anything else, stuff a clean shop rag into the opening of the crankcase around the connecting rod. This prevents anything—specifically the dreaded circlips—from falling down into the bottom of the engine. If a clip falls into the bottom end, you will have to take the entire engine apart to get it out.
• Locate the circlips on the side of the piston wrist pin. Using a small pick or needle-nose pliers, compress or pry the circlip out of its groove. You usually only need to remove one side. Once the clip is out, you can push the wrist pin out from the opposite side. If it's tight, you can use a socket extension to gently push it.
• Lift the old piston off the connecting rod. Remove the old needle bearing from the top of the rod and discard it.
Step 4: Installing the New Piston
• Take your new piston kit out of the box. Before installation, check your piston ring end gap. Place the new ring into the cylinder (use the piston to push it down squarely about an inch). Use a feeler gauge to measure the gap in the ring. Consult your owner's manual for the specific tolerance. If it's too tight, the ring will expand when hot and seize the engine; you may need to file the ends slightly.
• Install the rings onto the new piston. Be careful here: 2-stroke pistons have small "locating pins" in the ring grooves. You must ensure the gap in the piston ring lines up perfectly with this pin. If you force the ring over the pin, it won't seat, and you won't be able to get the piston into the cylinder.
• Install one new circlip into one side of the piston before putting it on the bike. It's much easier to do this on a workbench than on the bike.
• Apply a generous coat of 2-stroke oil to the new needle bearing and slide it into the connecting rod. Place the piston over the rod. Crucial Step: Look for an arrow or a mark on the top of the piston. This arrow almost always points toward the exhaust port (the front of the engine).
• Slide the wrist pin through the piston and bearing. Once it is flush, install the second circlip. Double-check that both clips are fully seated in their grooves. Spin them with a pick to verify they are locked in.
Step 5: Reassembly
• Remove the rag from the crankcase. Ensure the mating surfaces on the engine case and the cylinder base are perfectly clean. Remove all old gasket material. Install the new base gasket.
• Lubricate the piston and rings with fresh 2-stroke oil. Also, wipe a film of oil on the inside of the cylinder wall. Carefully slide the cylinder down over the piston. You will need to squeeze the rings with your fingers to get them to slide into the bore. Do not force this! If it stops, check that the rings are lined up with the locating pins.
• Once the cylinder is seated, torque the base nuts to the manufacturer's specifications. Install the new O-rings or head gasket, place the cylinder head back on, and torque the head bolts in a crisscross pattern to ensure an even seal.
• Reattach your coolant hoses, engine brackets, spark plug, and exhaust. Refill the cooling system with fresh coolant. Put your tank and seat back on.
Tips and Tricks for a Smooth Rebuild
- The "Rag Trick": We mentioned it earlier, but it bears repeating. Always cover the crankcase opening. It is the cheapest insurance policy you can buy.
- Inspect the Cylinder: While the cylinder is off, look at the plating. If you see deep scratches, chipping plating, or aluminum transfer, a new piston won't fix your problem. You may need a re-plate or a new cylinder.
- Heat Cycles: Don't just go out and hold it wide open immediately. Start the bike, let it come up to operating temperature, and then shut it off. Let it cool completely. Do this two or three times. This allows the new parts to expand and seat together properly without seizing.
- Check the Power Valve: On most modern 2-strokes, the power valve assembly is in the cylinder. This is a great time to clean off the carbon buildup that accumulates there.
Frequently Asked Questions
How often should I change my 2-stroke piston?
This depends heavily on how you ride. For a pro racer on a 125cc, it might be every 10-15 hours. For a casual trail rider on a 250cc or 300cc, you might get 50 to 100 hours. A compression test is a good way to monitor health.
Can I reuse my old gaskets?
No. Gaskets compress to form a seal. Once used, they lose their ability to seal effectively. Always use a new top-end gasket kit to prevent air leaks, which can cause a lean condition and engine damage.
Do I need to hone the cylinder?
Most modern dirt bikes use Nikasil plated cylinders. You generally do not hone these with a traditional stone hone. However, you can use a Scotch-Brite pad or a soft ball hone specifically designed for plated cylinders to clean up the cross-hatching and remove glazing.
Performing your own 2-stroke top end rebuild is a rite of passage for dirt bike riders. It demystifies the machine and gives you the peace of mind that your bike is ready for the abuse of the track or the trail. By keeping up with regular piston maintenance, you avoid catastrophic failures that can ruin a cylinder or a crank.
When it comes to choosing parts, quality matters. You want components that can withstand high RPMs and extreme heat. We highly recommend sticking to reputable brands known for durability and performance, such as Vertex, Wiseco, and Pro-X. These brands offer OEM quality (or better) and have kits that include everything you need to get the job done right.
Now that you have the knowledge, order your parts, clear off your workbench, and give your bike the fresh life it deserves.
Recent Posts
-
How Spring Rate Changes Transform Your Dirt Car's Handling
Master Your Dirt Car: How Spring Rates Transform Handling You hit the entry of turn one, pitch the c …Mar 5th 2026 -
Ford 427 Crate Engine: Specs, Performance & FAQ
Unboxing the Beast: A Guide to the Ford 427 Crate Engine When the name "427" is mentioned in Ford c …Feb 25th 2026 -
J-Bar Tuning Guide: Controlling Roll & Balance in Dirt Cars
Master Dirt Track Handling: A Guide to J-Bar Tuning & Adjustments Ever feel like your dirt car has …Feb 17th 2026


